
How to Delete All Posts on a Facebook Page (2025 Guide)
Managing a Facebook Page involves more than just creating content – it also includes reviewing, editing, and sometimes deleting old posts. Whether you’re cleaning up outdated promotions, removing old branding, or addressing accidental posts, knowing how to delete Facebook Page content is essential.
In this guide, we’ll walk through the steps to delete posts directly on your Facebook Page using Facebook’s built-in tools.
Why Should You Delete Page Posts
Before jumping into the how-to, here are a few common reasons people remove Facebook Page content:
- Outdated announcements or expired offers
- Posts with incorrect information
- Rebranding efforts or content audits
- Removing low-performing or off-brand material
Additionally, old Facebook posts may contain sensitive information about previous team members, company locations, executive hires. Minimizing the amount of this information by deleting it after a period of time helps businesses stay secure, protecting the privacy of the company and its’ employees.
How To Delete Facebook Page Posts
1. Log in to Facebook
Go to facebook.com and log into your account that has admin or editor access to the Page.
Alternatively, you can login to Meta Business Suite directly if your page is part of a Business Suite account.
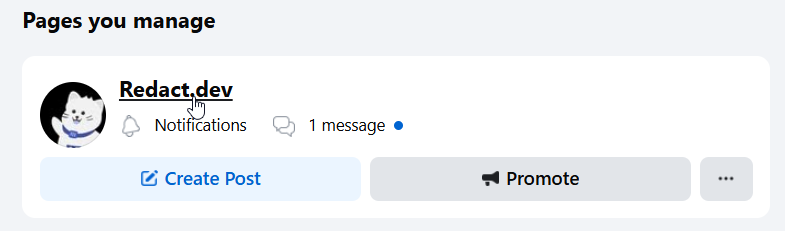
2. Go to Your Facebook Page
From the left-hand sidebar, click Pages and select the Page you manage.

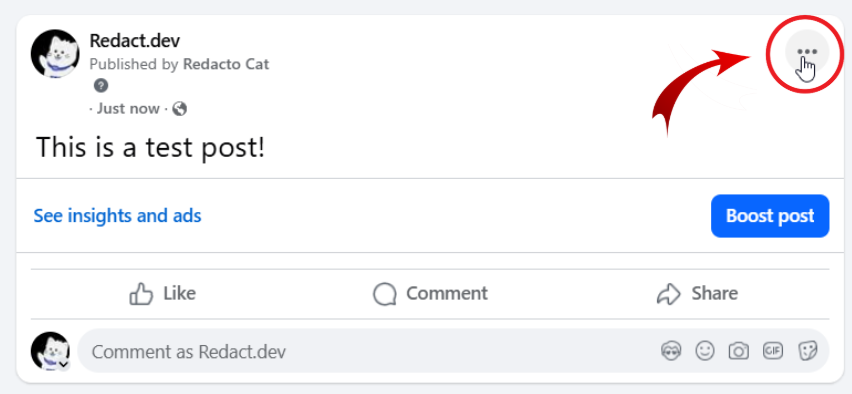
3. Find the Post
Scroll through your timeline or go to Meta Business Suite → Posts & Stories to see all published content.
Next to the post you want to remove, click the three dots in the top-right corner.
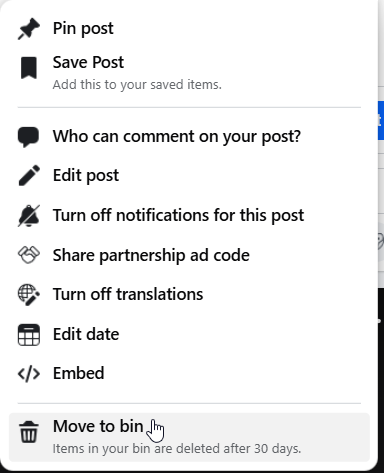
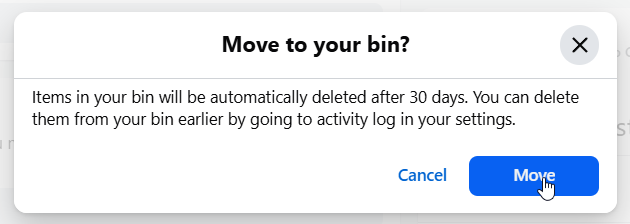
4. Select “Move to bin”
From the dropdown menu, select Move to bin, then hit the Move button to confirm it. Facebook will move the post to the Page’s bin, where it will stay for 30 days before permanent deletion.
5. Go to Page Settings
Once you’ve trashed a post, it will go to your bin for 30 days. You can delete them immediately instead, by navigating to your page settings here:

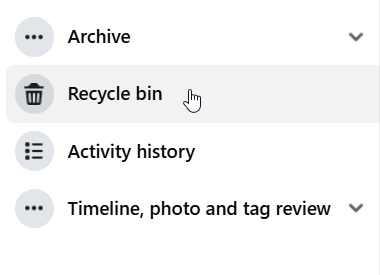
6. Find The Activity Log
Search or look for the “Activity Log” section in your page settings. It should be on the left-hand navigation bar.

7. Go to the Recycle bin
Once you’re in the Activity log, you should be able to see the Recycle Bin button on the left. Click this tab and you should see your deleted posts.
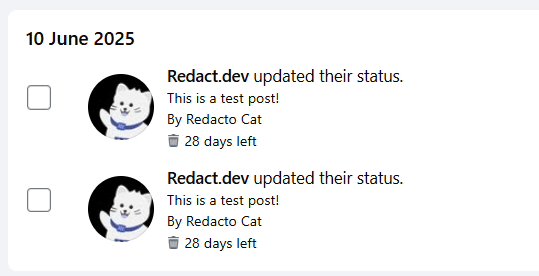
8. Find and select the posts you want to delete
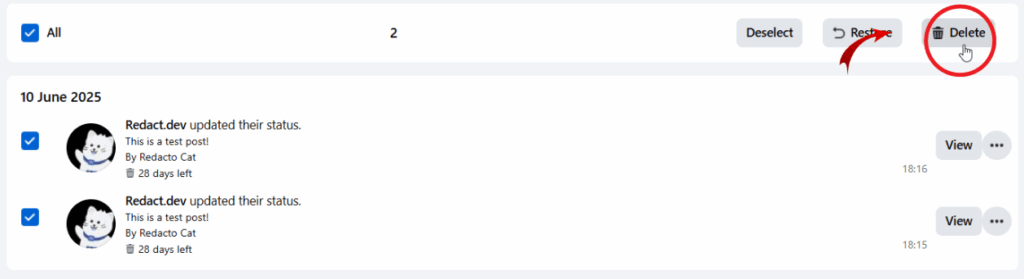
In your Facebook page’s recycle bin you should be able to see all of the posts you deleted earlier on. You can scroll through this list and click the checkbox to select the posts you’d like to delete permanently.
Once you’ve selected the posts you’d like to delete, just hit the delete button in the top right of the recycle bin.
Want to Delete All Facebook Page Posts at Once? Redact Can Help
While Facebook’s native tools allow you to delete posts one at a time or in limited batches, the process can be slow and time-consuming – especially if your Page has years of content.
If you’re looking to wipe your Facebook Page clean or remove large volumes of posts quickly, Redact offers an enterprise-level solution designed specifically for this purpose. With a Redact Enterprise subscription, you can:
- Mass delete all Page posts in a single session
- Target posts by date range, keyword, or engagement level
- Automate bulk deletion across multiple Pages or platforms
- Get expert support and onboarding from the Redact team
This is ideal for brands going through a rebrand, agencies managing client content, or any organization that wants full control over their Facebook Page history – without the manual effort.
Interested in Redact for your Facebook Page? Get in touch or learn more about Enterprise options to get started.